Lecture14 - Gazebo and Robot(2)
FusionBot과 Gazebo
Description 예시를 통해 URDF에 대해 습득하였다면, 이제 Gazebo에 로봇을 등장시키고, 이동, 센싱을 구현할 차례입니다. FusionBot을 통해 실습을 진행해보고, 이전 예시에서의 로봇들도 함께 분석해 보겠습니다.
강의에서는, Gazebo에서 로봇을 등장시키는 2가지 방법을 제시하고자 합니다.
- Xacro 파일을 통한 로봇 Spawn
- URDF 파일을 통한 로봇 Spawn
두 방식 모두 launch file에서 실행되는 Node들은 동일합니다.
- gazebo_ros를 통해 gazebo server와 client를 실행하고
- robot_state_publisher와 joint_state_publisher를 통해 robot_description topic을 준비합니다.
- 마지막으로, gazebo_ros에서 제공하는 spawn_entity라는 Node를 통해 로봇을 Gazebo 상에 등장시킵니다.
저는 새로운 예시를 위해 패키지를 분리하고, launch file의 이름을 empty_gazebo.launch.py로 설정하였습니다. LaunchDescription은 아래와 같습니다. (여러분은 패키지를 분리하지 않으셔도 좋습니다.)
return LaunchDescription([
    start_gazebo_server_cmd,
    start_gazebo_client_cmd,
    robot_state_publisher,
    joint_state_publisher,
    spawn_entity,
])
Xacro 파일을 통한 로봇 Spawn
- Gazebo는 package://를 통한 파일 접근을 인식할 수 없습니다. 따라서, fusionbot.urdf.xacro 파일 안의 관련된 부분을 모두 $(find pkg) 형태로 변형해줍니다.
# From
<link name="base_link">
  <inertial>
    <origin rpy="0 0 0" xyz="0.0038631391370923516 -1.6603718341471133e-17 0.05277089743549162"/>
    <mass value="2.3225264704023765"/>
    <inertia ixx="0.00792" ixy="-0.0" ixz="-0.000339" iyy="0.008432" iyz="-0.0" izz="0.014814"/>
  </inertial>
  <visual>
    <origin rpy="0 0 0" xyz="0 0 0"/>
    <geometry>
      <mesh filename="package://temp_description/meshes/base_link.stl" scale="0.001 0.001 0.001"/>
    </geometry>

# To
<link name="base_link">
  <inertial>
    <origin rpy="0 0 0" xyz="0.0038631391370923516 -1.6603718341471133e-17 0.05277089743549162"/>
    <mass value="2.3225264704023765"/>
    <inertia ixx="0.00792" ixy="-0.0" ixz="-0.000339" iyy="0.008432" iyz="-0.0" izz="0.014814"/>
  </inertial>
  <visual>
    <origin rpy="0 0 0" xyz="0 0 0"/>
    <geometry>
      <mesh filename="$(find temp_description)/meshes/base_link.stl" scale="0.001 0.001 0.001"/>
    </geometry>
- xacro 파일의 경로를 탐색한 뒤, robot_description과 호환을 위한 몇가지 변경을 적용하여 argument를 준비합니다.
xacro_file = os.path.join(description_pkg_path, 'urdf', 'fusionbot.urdf.xacro')
robot_description_content = Command(
    [
        PathJoinSubstitution([FindExecutable(name="xacro")]),
        " ",
        xacro_file,
        " ",
        "name:=fusionbot",
        " ",
        "prefix:=''",
        " ",
        "is_sim:=true",
    ]
)
robot_description = {"robot_description": robot_description_content}
항상 정적 파일이 수정된 다음에는 colcon build를 잊지 맙시다!
URDF 파일을 통한 로봇 Spawn
- urdf를 생성하고, 이를 통해 gazebo에서 로봇을 등장시킬 수 있습니다. xacro file ⇒ URDF로의 변환을 진행합니다.
cd ~/ros2_ws/src/du2023-gz/<your-pkg>/urdf
xacro fusionbot.urdf.xacro > fusionbot.urdf

# 혹은 colcon build를 사용해도 됩니다.
colcon build --packages-select temp_description
- 이렇게 만들어진 URDF 파일은 아래와 같이 절대 경로가 삽입되기 때문에 여러분의 환경에서만 사용 가능함에 유의합니다.
    <collision>
      <origin rpy="0 0 0" xyz="-0.05 -0.0 -0.11"/>
      <geometry>
        <mesh filename="/home/kimsooyoung/ros2_ws/install/test_description/share/test_description/meshes/lidar_1.stl" scale="0.001 0.001 0.001"/>
      </geometry>
    </collision>
  </link>
- URDF 파일을 robot_state_publisher에게 전달하는 방법은 아래와 같습니다. xacro 패키지의 내장 함수를 통해 손쉬운 변환이 가능합니다.
urdf_file = os.path.join(description_pkg_path, 'urdf', 'fusionbot.urdf')

doc = xacro.parse(open(urdf_file))
xacro.process_doc(doc)
robot_description = {'robot_description': doc.toxml()}
이렇게 두가지 방법을 배우는 까닭은 실제 오픈소스를 사용하다보면 xacro와 urdf를 혼용하여 배포하기 때문입니다.
- 이제, 완성된 launch 파일을 통해 gazebo상에 로봇을 등장시켜봅시다.
ros2 launch temp_description empty_gazebo.launch.py
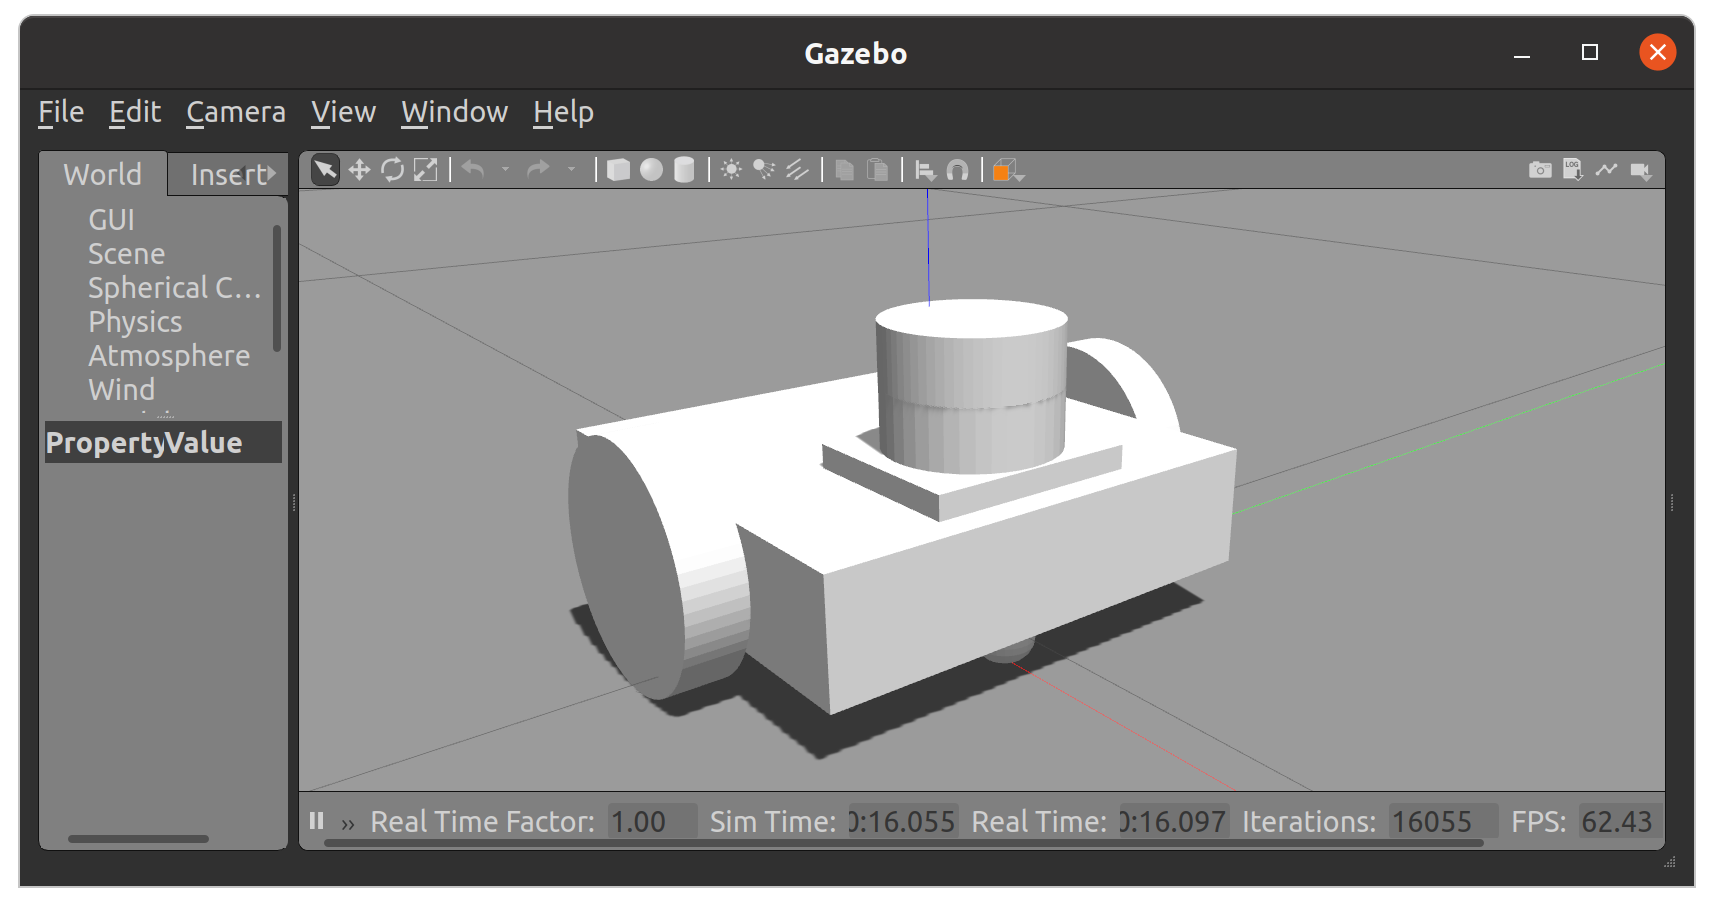
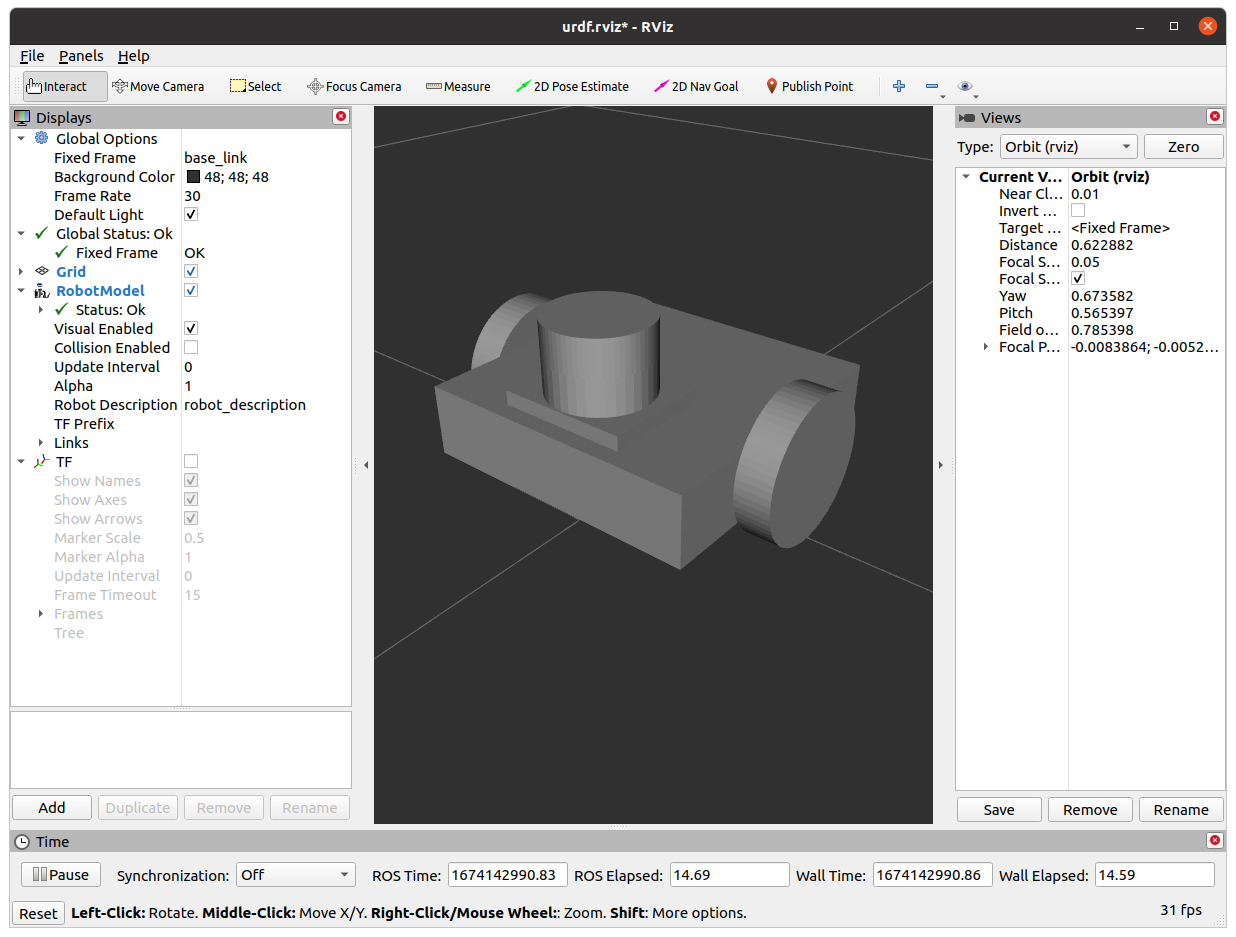
지금 등장시킨 로봇은 색도 없고 제어기, 센서도 없기 때문에 단순 질량 덩어리에 불과합니다. 이제부터 로봇에 여러 요소들을 추가하여 실제 로봇과 유사하게 변신시켜보겠습니다.
Gazebo Plugins
Gazebo에서 인식할 수 있는 색상을 지정하고, 센서와 제어기를 연동하여 실제 로봇 시뮬레이션을 완성해보고자 합니다. 지금부터 fusionbot.gazebo 파일을 수정하여 이를 구현해봅시다.
우선, 비교적 쉬운 색상 변경부터 진행해봅시다.
- 파일 최상단 여러 색상을 변수로 지정합니다.
<?xml version="1.0" ?>
<robot name="fusionbot" xmlns:xacro="http://www.ros.org/wiki/xacro" >

<xacro:property name="body_color" value="Gazebo/Silver" />
<xacro:property name="lidar_color" value="Gazebo/Blue" />
<xacro:property name="wheel_color" value="Gazebo/Black" />
- 각 Link 내 material 태그 속성으로 선언한 변수를 할당합니다.
<gazebo reference="base_link">
  <material>${body_color}</material>
  <mu1>0.1</mu1>
  <mu2>0.1</mu2>
  <selfCollide>true</selfCollide>
  <gravity>true</gravity>
</gazebo>

<gazebo reference="lidar_1">
  <material>${lidar_color}</material>
  <mu1>0.2</mu1>
  <mu2>0.2</mu2>
  <selfCollide>true</selfCollide>
</gazebo>

<gazebo reference="right_wheel_1">
  <material>${wheel_color}</material>
  <mu1>100000.0</mu1>
  <mu2>100000.0</mu2>
  <selfCollide>true</selfCollide>
</gazebo>
...
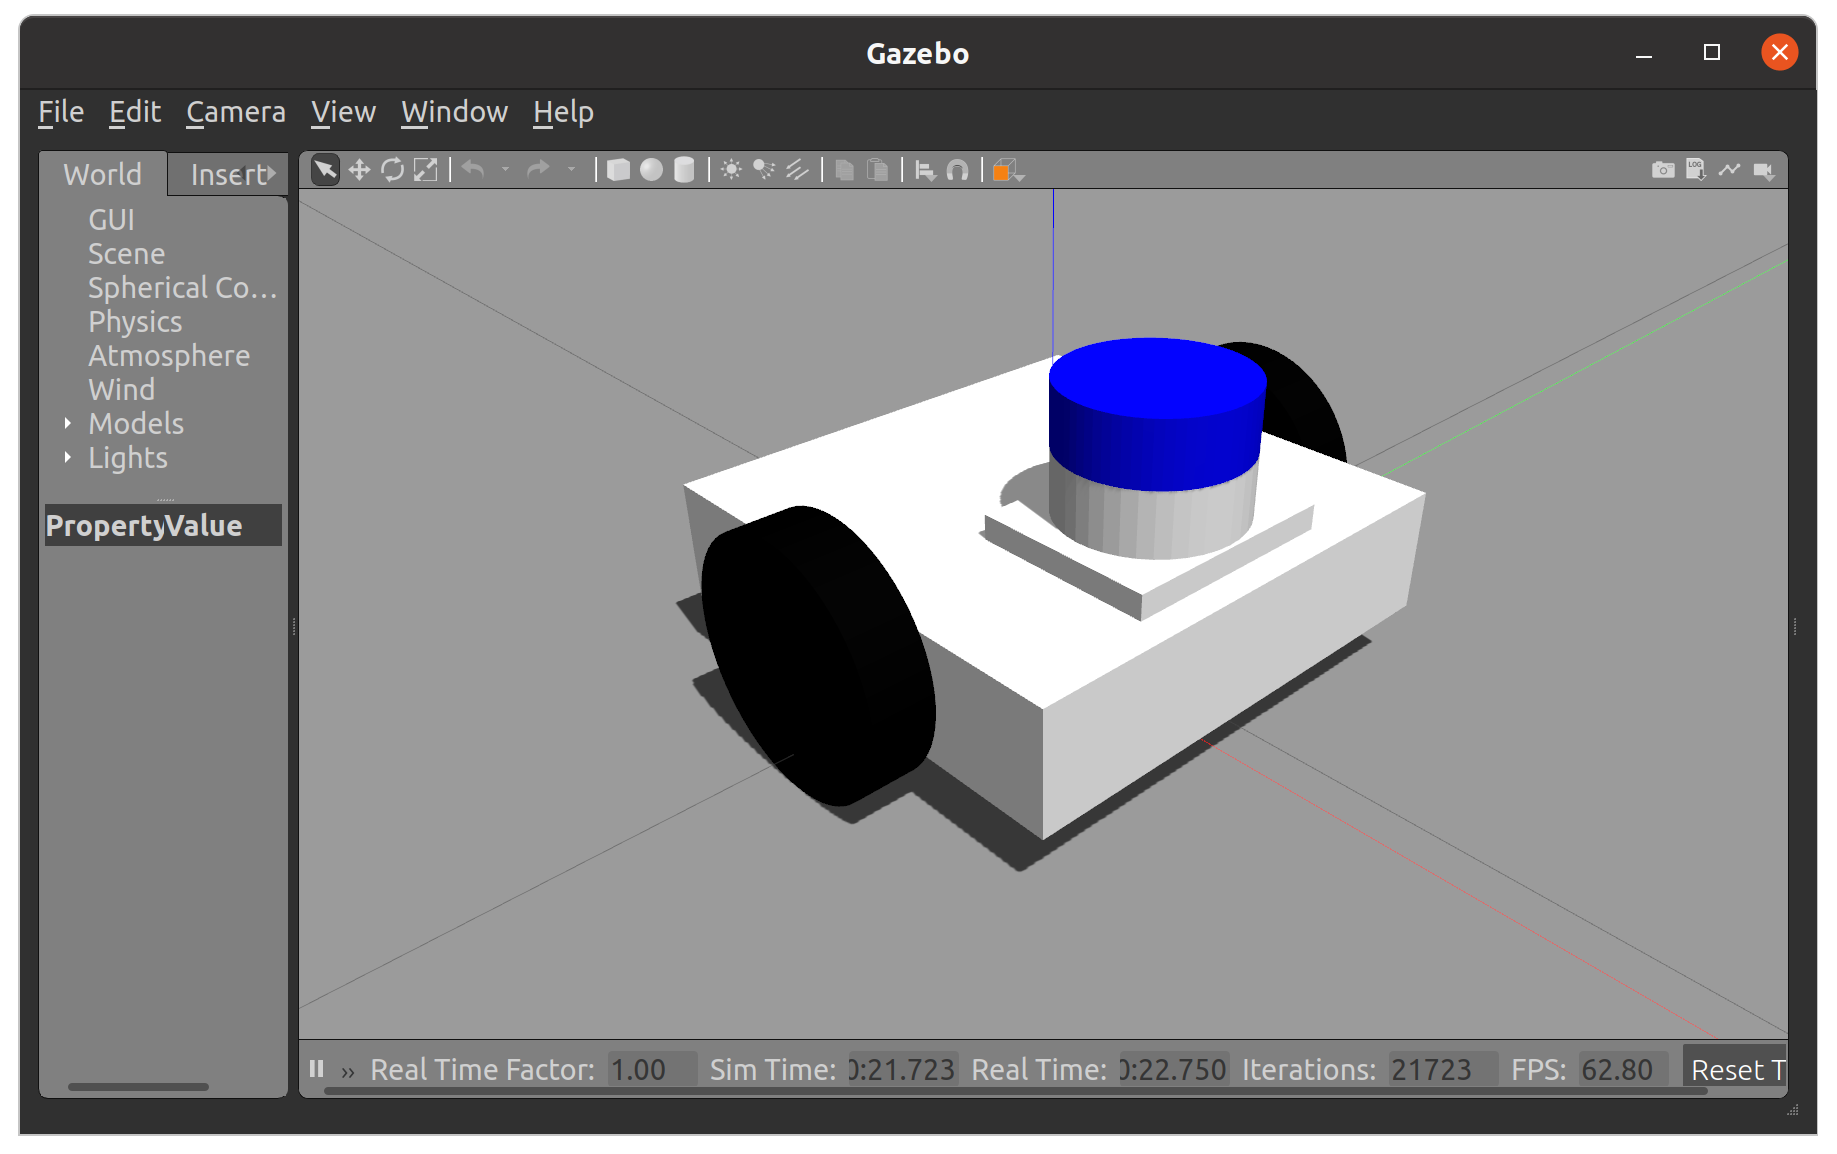
- 패키지를 빌드한 후 다시 Gazebo launch file을 실행시켜봅시다.
지금부터 다양한 Gazebo Plugin들을 사용하여 로봇과 ROS 사이의 실질적인 연동을 해보겠습니다. 이를 위해 xacro 파일에 새로운 link들을 추가할 예정입니다.
Mono Camera
- fusionbot.urdf.xacro 수정 - camera_link와 camera_joint 추가
<link name="camera_link">
  <pose>0 0 0 0 0 0</pose>
</link>

...

<joint name="camera_joint" type="fixed">
  <origin rpy="0 0 0" xyz="0.1 0.0 0.05" />
  <parent link="base_link" />
  <child link="camera_link" />
  <axis xyz="0.0 0.0 0.0" />
</joint>
- urdf 폴더 안에 sensors라는 폴더를 추가한 뒤, mono_cam.gazebo를 추가합니다.
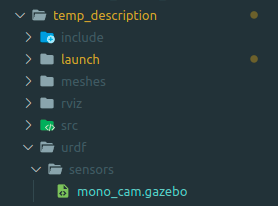
<?xml version="1.0" ?>
<robot name="fusionbot" xmlns:xacro="http://www.ros.org/wiki/xacro" >

<gazebo reference="camera_link">
  <sensor name="front_camera" type="camera">
    <update_rate>30.0</update_rate>
    <visualize>false</visualize>
    <always_on>1</always_on>
    <camera name="front_camera">
      <!-- math.atan(320 / 687.8065795898438) * 2 -->
      <horizontal_fov>0.8709216071359963</horizontal_fov>
      <image>
        <width>1280</width>
        <height>720</height>
        <format>R8G8B8</format>
        <!-- <format>B8G8R8</format> -->
      </image>
      <clip>
        <near>0.02</near>
        <far>300</far>
      </clip>
      <noise>
        <type>gaussian</type>
        <mean>0.0</mean>
        <stddev>0.00007</stddev>
      </noise>
    </camera>
    <plugin filename="libgazebo_ros_camera.so" name="camera_controller">
      <ros>
        <!-- <namespace>custom_ns</namespace> -->
        <remapping>image_raw:=image_raw</remapping>
        <remapping>camera_info:=camera_info</remapping>
      </ros>
      <camera_name>front_camera</camera_name>
      <frame_name>camera_link</frame_name>
      <hack_baseline>0.07</hack_baseline>
    </plugin>
  </sensor>
</gazebo>

</robot>
| update_rate | data publish rate |
|---|---|
| visualize | 시각화 옵션 |
| horizontal_fov | 카메라의 화각 |
| image | 화질 옵션 |
| noise | 센서 노이즈 |
| remapping | topic 이름 재설정 |
| camera_name | topic의 namespace가 됩니다. |
| frame_name | camera가 장착되는 link |
| hack_baseline | stereo camera 사용 시 카메라 사이 거리 |
⇒ 이렇게 xml 형태의 스크립트를 추가하여 gazebo plugin을 사용할 수 있습니다.
- fusionbot.gazebo 수정
<?xml version="1.0" ?>
<robot name="fusionbot" xmlns:xacro="http://www.ros.org/wiki/xacro" >

<xacro:property name="body_color" value="Gazebo/Silver" />
<xacro:property name="lidar_color" value="Gazebo/Blue" />
<xacro:property name="wheel_color" value="Gazebo/Black" />

<xacro:include filename="$(find temp_description)/urdf/sensors/mono_cam.gazebo" />

<gazebo>
  <plugin filename="libgazebo_ros_control.so" name="control"/>
</gazebo>
- 예제 재실행
colcon build --symlink-install --packages-select temp_description
source install/local_setup.bash

ros2 launch temp_description empty_gazebo.launch.py

rviz를 통해 카메라 데이터를 확인해봅시다.
Depth Camera
- fusionbot.urdf.xacro 수정 - depth_camera_link와 depth_camera_optical_joint 추가
<link name="depth_camera_link">
  <pose>0 0 0 0 0 0</pose>
</link>
...

<joint name="depth_camera_optical_joint" type="fixed">
  <origin rpy="-1.57079632679 0 -1.57079632679" xyz="0 0 0" />
  <parent link="depth_camera_link" />
  <child link="depth_camera_optical_link" />
  <axis xyz="0.0 0.0 0.0" />
</joint>
- urdf 폴더 안에 sensors라는 폴더를 추가한 뒤, depth_cam.gazebo를 추가합니다.
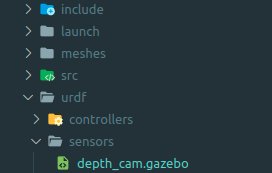
<?xml version="1.0" ?>
<robot name="fusionbot" xmlns:xacro="http://www.ros.org/wiki/xacro" >

<gazebo reference="depth_camera_link">
  <sensor name="front_depth_camera" type="depth">
    <update_rate>30.0</update_rate>
    <visualize>false</visualize>
    <always_on>1</always_on>
    <camera name="front_depth_camera">
      <!-- math.atan(320 / 687.8065795898438) * 2 -->
      <horizontal_fov>0.8709216071359963</horizontal_fov>
      <image>
        <width>1280</width>
        <height>720</height>
        <format>R8G8B8</format>
        <!-- <format>B8G8R8</format> -->
      </image>
      <clip>
        <near>0.02</near>
        <far>300</far>
      </clip>
      <noise>
        <type>gaussian</type>
        <mean>0.0</mean>
        <stddev>0.00007</stddev>
      </noise>
    </camera>
    <plugin filename="libgazebo_ros_camera.so" name="camera_controller">
      <ros>
        <!-- <namespace>custom_ns</namespace> -->
        <remapping>front_depth_camera/image_raw:=front_depth_camera/image_raw</remapping>
        <remapping>front_depth_camera/image_depth:=front_depth_camera/image_depth</remapping>
        <remapping>front_depth_camera/camera_info:=front_depth_camera/camera_info</remapping>
        <remapping>front_depth_camera/camera_info_depth:=front_depth_camera/camera_info_depth</remapping>
        <remapping>front_depth_camera/points:=front_depth_camera/points</remapping>
      </ros>

      <camera_name>front_depth_camera</camera_name>
      <frame_name>depth_camera_optical_link</frame_name>

      <hack_baseline>0.07</hack_baseline>

      <min_depth>0.001</min_depth>
      <max_depth>300.0</max_depth>
    </plugin>
  </sensor>
</gazebo>

</robot>
| sensor type | depth |
|---|---|
| min_depth, max_depth | depth 탐지거리 |
⇒ depth camera는 camera 좌표계를 사용하기 때문에 별도 joint를 지정해줘야 합니다.
- fusionbot.gazebo 수정
<?xml version="1.0" ?>
<robot name="fusionbot" xmlns:xacro="http://www.ros.org/wiki/xacro" >

<xacro:property name="body_color" value="Gazebo/Silver" />
<xacro:property name="lidar_color" value="Gazebo/Blue" />
<xacro:property name="wheel_color" value="Gazebo/Black" />

<xacro:include filename="$(find temp_description)/urdf/sensors/mono_cam.gazebo" />
<xacro:include filename="$(find fusionbot_gazebo)/urdf/sensors/depth_cam.gazebo" />

<gazebo>
  <plugin filename="libgazebo_ros_control.so" name="control"/>
</gazebo>
- 예제 재실행
colcon build --symlink-install --packages-select temp_description
source install/local_setup.bash

ros2 launch temp_description empty_gazebo.launch.py
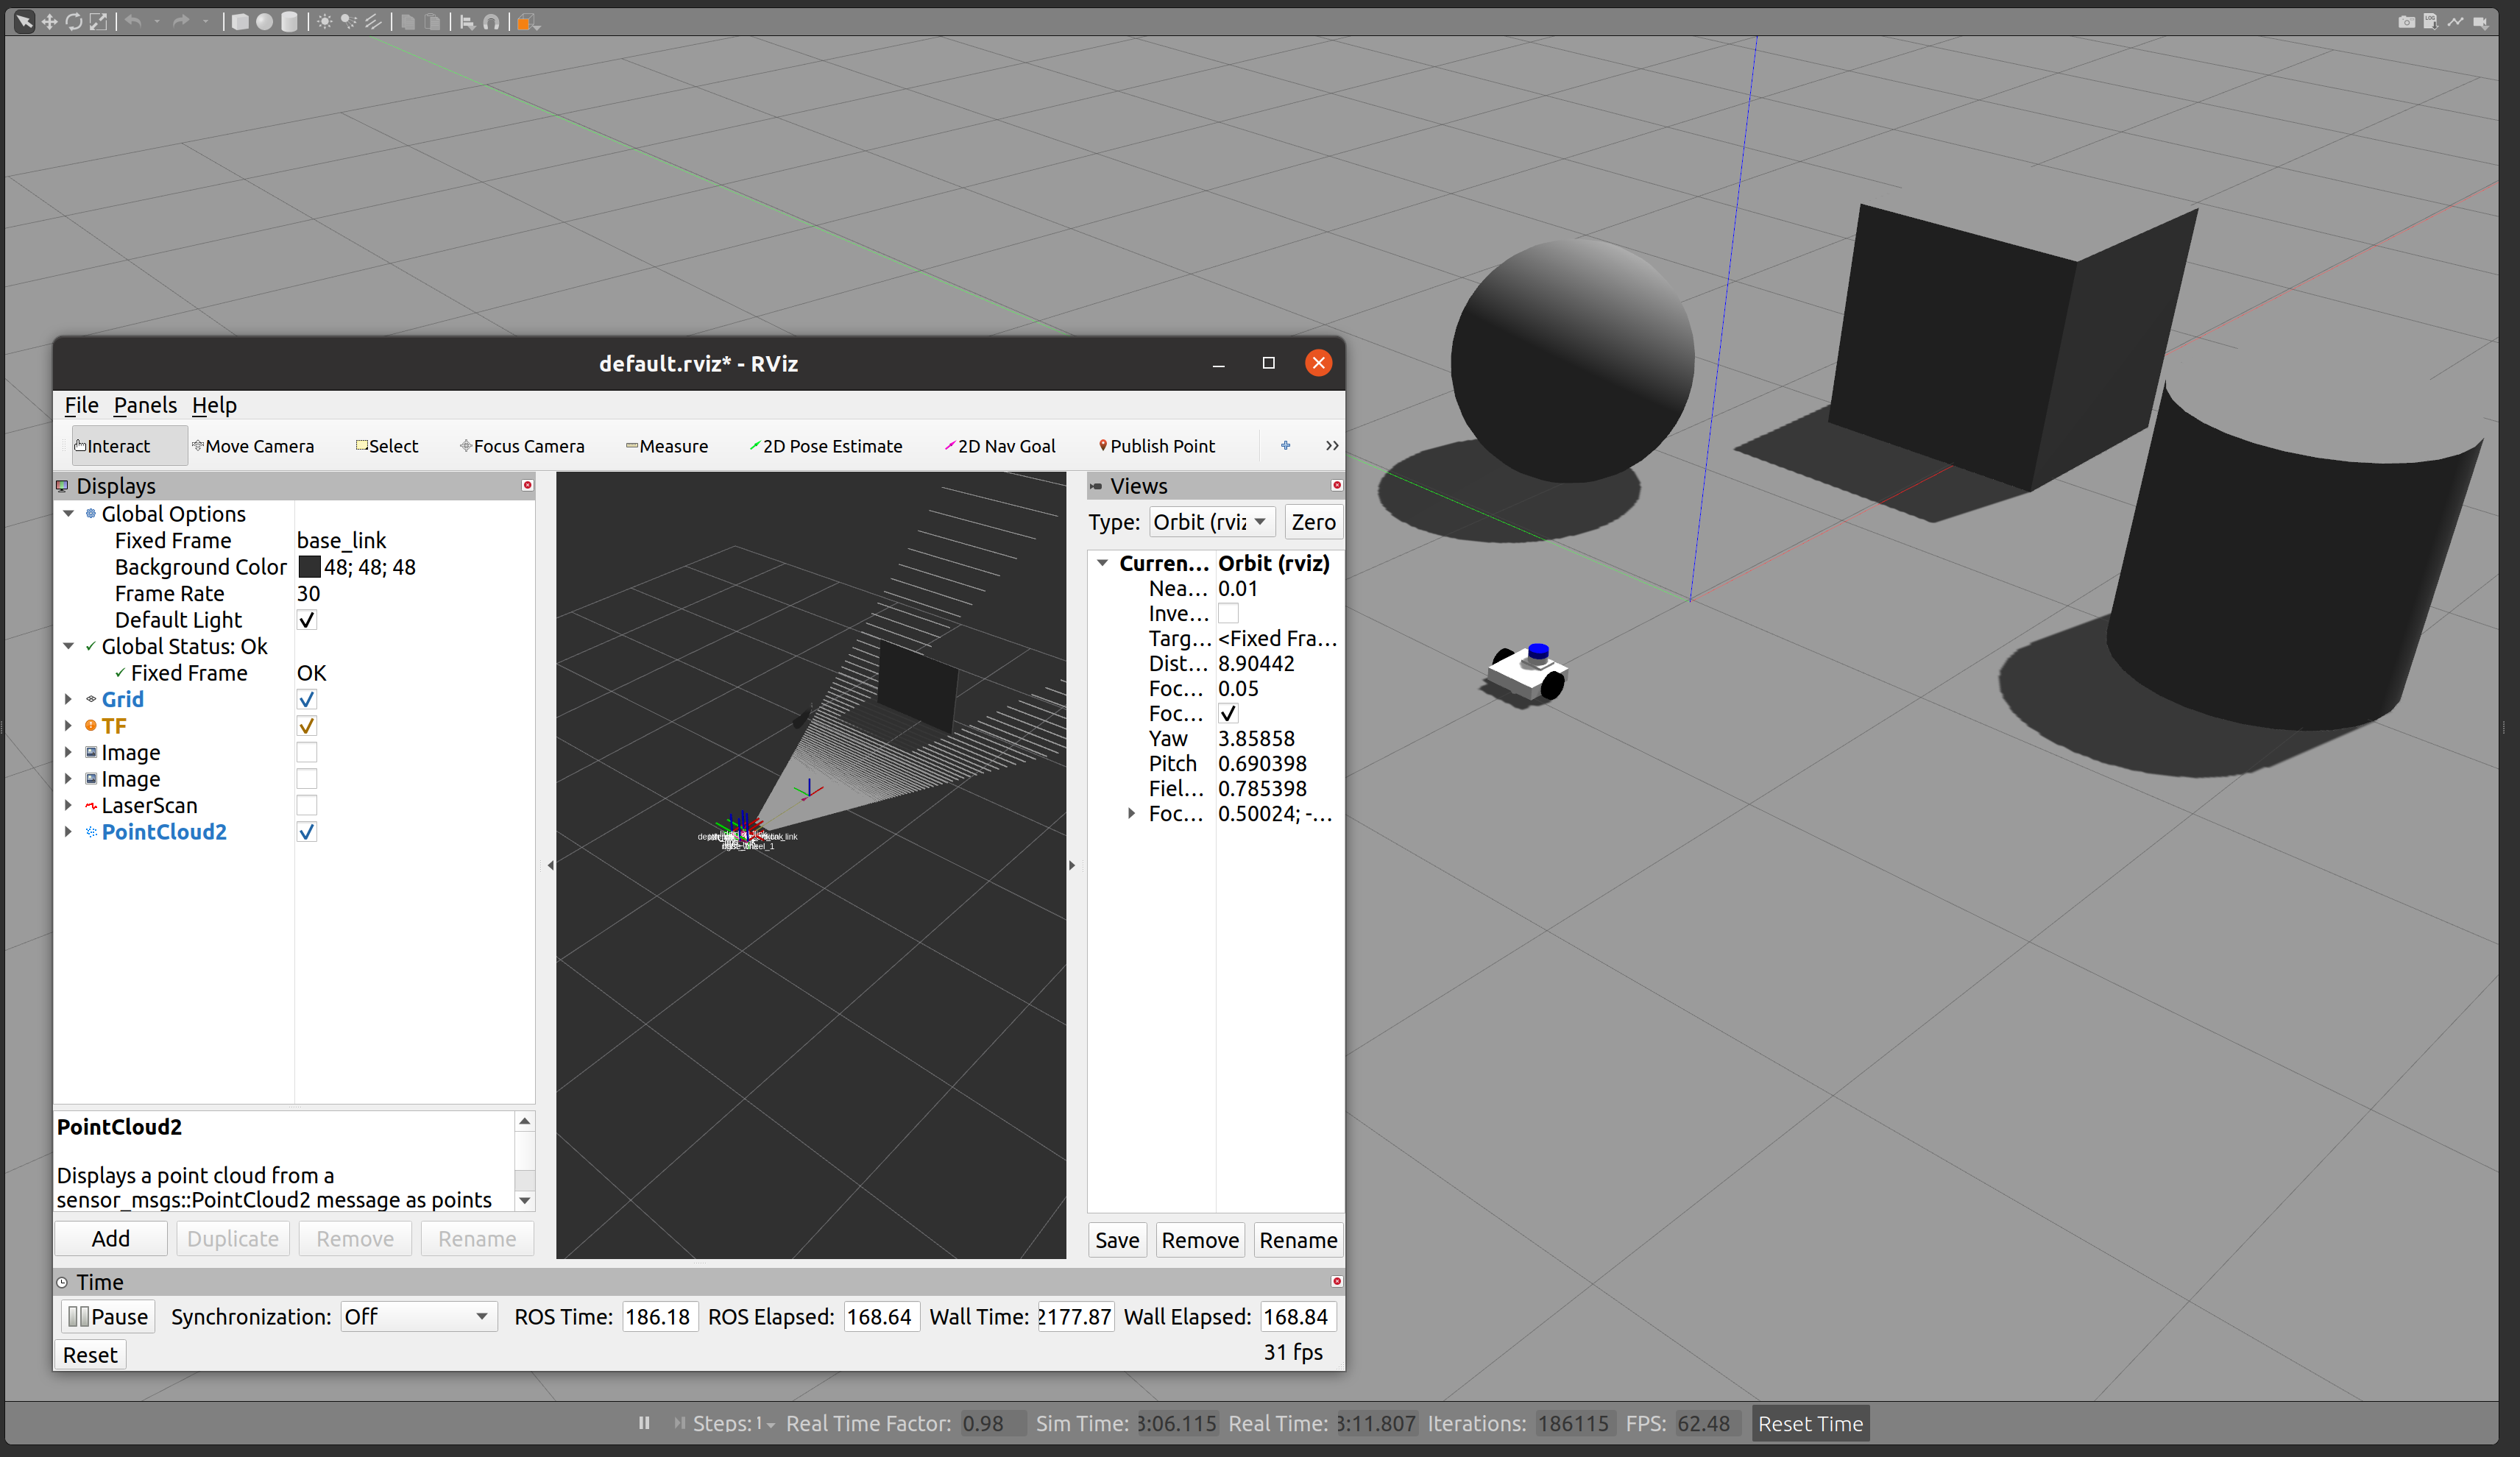
⇒ rviz를 통해 카메라 데이터를 확인해봅시다.
2D Lidar
- urdf sensors 폴더 안에 lidar_2d.gazebo를 추가합니다.
<?xml version="1.0" ?>
<robot name="fusionbot" xmlns:xacro="http://www.ros.org/wiki/xacro" >

<xacro:property name="M_PI" value="3.1415926535897931" />

<gazebo reference="lidar_1">
  <sensor name="lidar" type="ray">
    <pose>0 0 0 0 0 0</pose>
    <always_on>true</always_on>
    <visualize>false</visualize>
    <update_rate>10</update_rate>
    <ray>
      <scan>
        <horizontal>
          <samples>360</samples>
          <resolution>1.000000</resolution>
          <min_angle>-${M_PI}</min_angle>
          <max_angle>${M_PI}</max_angle>
        </horizontal>
      </scan>
      <range>
        <min>0.15</min>
        <max>12.0</max>
        <resolution>0.5</resolution>
      </range>
      <noise>
        <type>gaussian</type>
        <mean>0.0</mean>
        <stddev>0.01</stddev>
      </noise>
    </ray>
    <plugin name="gazebo_ros_head_hokuyo_controller" filename="libgazebo_ros_ray_sensor.so">
      <ros>
        <remapping>~/out:=scan</remapping>
      </ros>
      <output_type>sensor_msgs/LaserScan</output_type>
      <frame_name>lidar_1</frame_name>
    </plugin>
  </sensor>
</gazebo>

</robot>
| horizontal | 라이다의 탐지 범위와 샘플 수를 지정합니다. |
|---|---|
| range | 탐지거리의 범위입니다. |
| output_type | ROS 2에서 사용하는 2D 라이다 데이터입니다. |
⇒ 해당 데이터 스펙은 실제 판매중인 rplidar a1을 구현하였습니다.
- fusionbot.gazebo 수정
<?xml version="1.0" ?>
<robot name="fusionbot" xmlns:xacro="http://www.ros.org/wiki/xacro" >

<xacro:property name="body_color" value="Gazebo/Silver" />
<xacro:property name="lidar_color" value="Gazebo/Blue" />
<xacro:property name="wheel_color" value="Gazebo/Black" />

<xacro:include filename="$(find temp_description)/urdf/sensors/mono_cam.gazebo" />
<xacro:include filename="$(find fusionbot_gazebo)/urdf/sensors/depth_cam.gazebo" />
<xacro:include filename="$(find temp_description)/urdf/sensors/lidar_2d.gazebo" />

<gazebo>
  <plugin filename="libgazebo_ros_control.so" name="control"/>
</gazebo>
- 예제 재실행
colcon build --symlink-install --packages-select temp_description
source install/local_setup.bash

ros2 launch temp_description empty_gazebo.launch.py
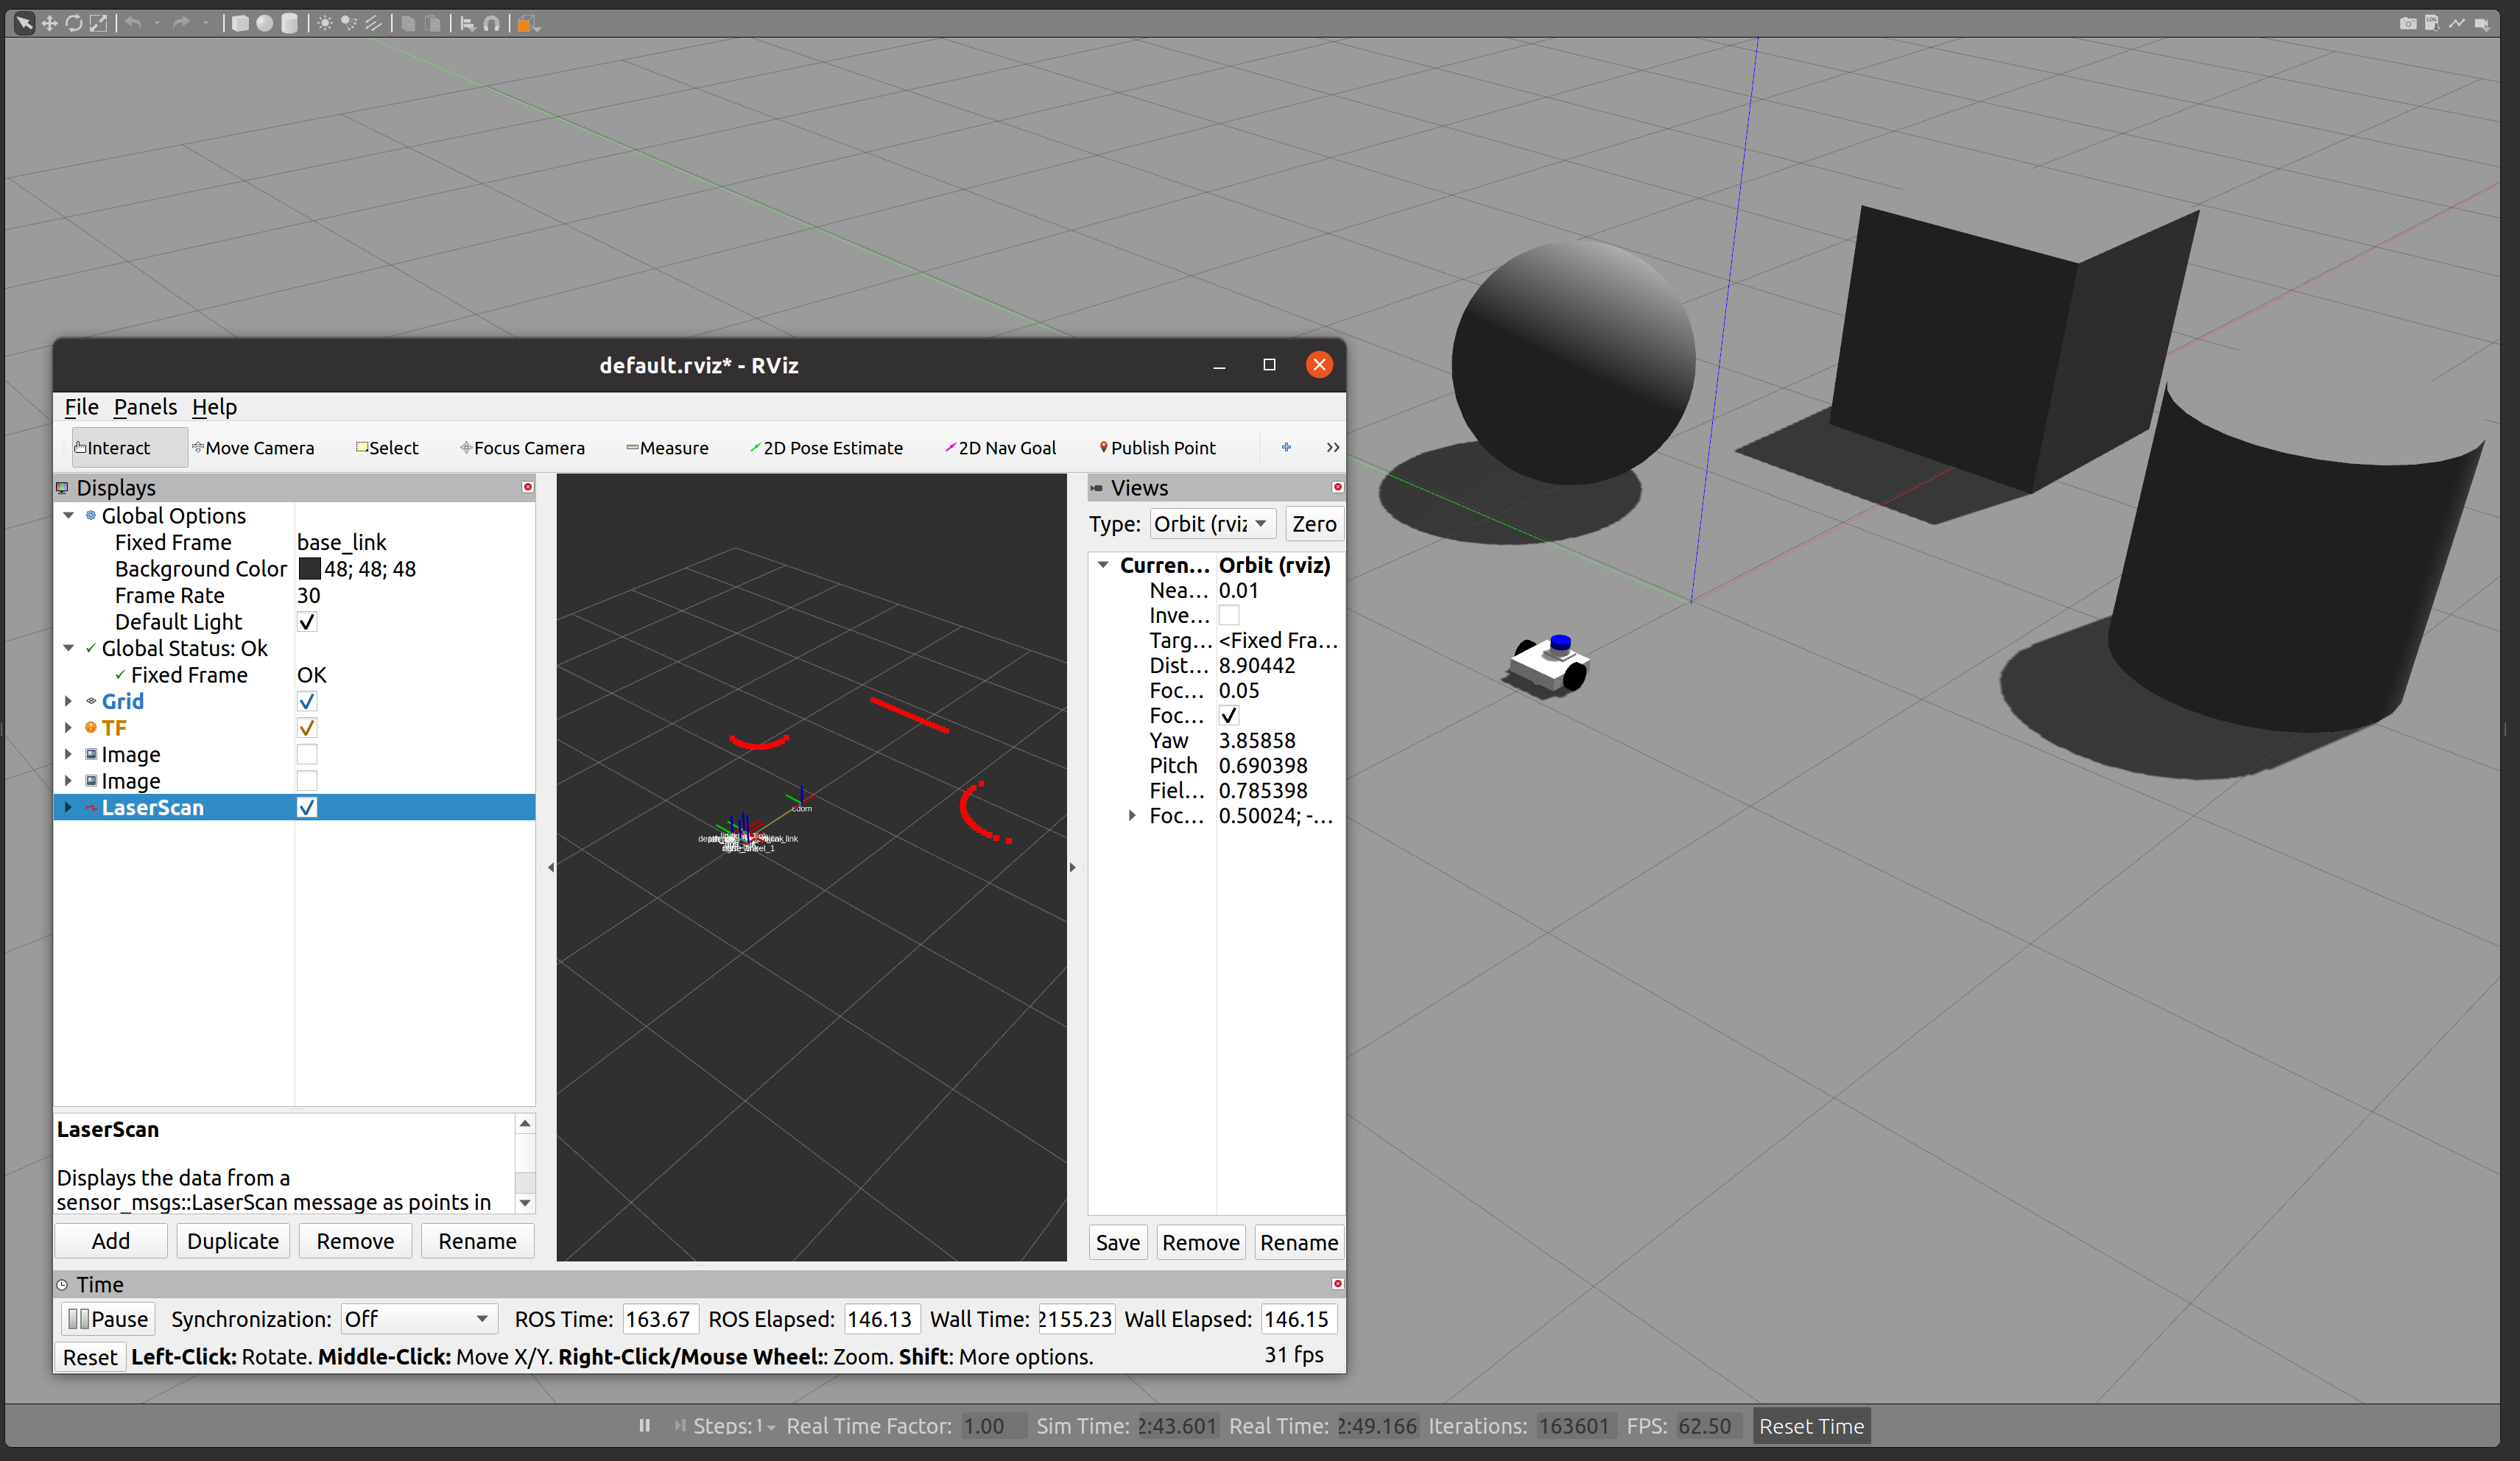
⇒ rviz를 통해 라이다 데이터를 확인해봅시다.
비슷한 맥락에서, 3D lidar와 GPS, IMU 등 다양한 센서를 추가할 수 있습니다.
- gps : https://github.com/RB2023ROS/du2023-gz/blob/main/fusionbot_gazebo/urdf/sensors/gps.gazebo
- imu : https://github.com/RB2023ROS/du2023-gz/blob/main/fusionbot_gazebo/urdf/sensors/imu.gazebo
- 3d lidar : https://github.com/RB2023ROS/du2023-gz/blob/main/fusionbot_gazebo/urdf/sensors/lidar_3d.gazebo
이렇게 센서를 추가하는 방법은 gazebo_ros_pkg의 wiki 페이지를 참고하였습니다. 해당 페이지에는 ROS 1과 ROS 2에서의 사용법 차이점, 그리고 예시 world까지 안내하고 있습니다. ⇒ gazebo_ros_pkgs
Diff Drive Controller
로봇 청소기와 같이 제자리 회전이 가능하며, 양쪽 바퀴 회전수 차이로 로봇을 이동시키는 타입을 DD Type이라고 부릅니다. gazebo_ros에서 제공되는 DD controller를 사용하여 Fusionbot이 이동할 수 있게 해보겠습니다.

- urdf 폴더 내부에 diff_drive.gazebo 파일을 추가한 뒤, 아래 내용을 붙여넣기 합니다.
<?xml version="1.0" ?>
<robot name="fusionbot" xmlns:xacro="http://www.ros.org/wiki/xacro" >

<gazebo>
  <plugin name='fusionbot_joint_state' filename='libgazebo_ros_joint_state_publisher.so'>
    <ros>
      <remapping>~/out:=joint_states</remapping>
    </ros>
    <update_rate>30</update_rate>
    <joint_name>right_wheel_joint</joint_name>
    <joint_name>left_wheel_joint</joint_name>
  </plugin>
</gazebo>

<gazebo>
  <plugin name='differential_drive_controller' filename='libgazebo_ros_diff_drive.so'>
    <update_rate>30</update_rate>
    <left_joint>left_wheel_joint</left_joint>
    <right_joint>right_wheel_joint</right_joint>
    <wheel_separation>0.2</wheel_separation>
    <wheel_diameter>0.1</wheel_diameter>
    <max_wheel_torque>50</max_wheel_torque>
    <max_wheel_acceleration>1.0</max_wheel_acceleration>
    <command_topic>cmd_vel</command_topic>
    <publish_odom>1</publish_odom>
    <publish_odom_tf>1</publish_odom_tf>
    <publish_wheel_tf>0</publish_wheel_tf>
    <odometry_topic>odom</odometry_topic>
    <odometry_frame>odom</odometry_frame>
    <robot_base_frame>base_footprint</robot_base_frame>
  </plugin>
</gazebo>

</robot>
- fusionbot.gazebo 파일을 다시 수정하고, launch 파일을 실행시키면 tf와 함께 제어되는 로봇을 확인하실 수 있습니다. (기본적으로 /cmd_vel topic을 통해 로봇을 조종할 수 있습니다.)
ROS 1 Gazebo Package
제공드린 zip 파일을 사용해서 ROS 1에서 동작하는 gazebo package를 만들어보겠습니다. ROS 2보다 훨씬 간편합니다. 😊
연습을 위해 다시 한 번 파일을 다운받겠습니다.
- fusionbot.gazebo을 아래와 같이 수정합니다.
<?xml version="1.0" ?>
<robot name="fusionbot" xmlns:xacro="http://www.ros.org/wiki/xacro" >

<xacro:property name="body_color" value="Gazebo/Silver" />

<gazebo>
  <plugin filename="libgazebo_ros_control.so" name="control"/>
</gazebo>
<gazebo reference="base_link">
  <material>${body_color}</material>
  <mu1>0.1</mu1>
  <mu2>0.1</mu2>
  <selfCollide>true</selfCollide>
  <gravity>true</gravity>
</gazebo>

<gazebo reference="lidar_1">
  <material>${body_color}</material>
  <mu1>0.2</mu1>
  <mu2>0.2</mu2>
  <selfCollide>true</selfCollide>
</gazebo>

<gazebo reference="right_wheel_1">
  <material>${body_color}</material>
  <mu1>100000.0</mu1>
  <mu2>100000.0</mu2>
  <selfCollide>true</selfCollide>
</gazebo>

<gazebo reference="left_wheel_1">
  <material>${body_color}</material>
  <mu1>1500</mu1>
  <mu2>1500</mu2>
  <selfCollide>true</selfCollide>
</gazebo>

</robot>
- fusionbot.xacro를 수정합니다.
# From
<joint name="��ü3" type="fixed">
  <origin rpy="0 0 0" xyz="0.05 0.0 0.11"/>
  <parent link="base_link"/>
  <child link="lidar_1"/>
</joint>

<joint name="ȸ��7" type="continuous">
  <origin rpy="0 0 0" xyz="0.0 -0.1 0.05"/>
  <parent link="base_link"/>
  <child link="right_wheel_1"/>
  <axis xyz="-0.0 -1.0 0.0"/>
</joint>

<joint name="ȸ��8" type="continuous">
  <origin rpy="0 0 0" xyz="0.0 0.1 0.05"/>
  <parent link="base_link"/>
  <child link="left_wheel_1"/>
  <axis xyz="-0.0 1.0 0.0"/>
</joint>

# To
<joint name="lidar_joint" type="fixed">
  <origin rpy="0 0 0" xyz="0.05 0.0 0.11" />
  <parent link="base_link" />
  <child link="lidar_1" />
</joint>

<joint name="right_wheel_joint" type="continuous">
  <origin rpy="0 0 0" xyz="0.0 -0.1 0.05" />
  <parent link="base_link" />
  <child link="right_wheel_1" />
  <axis xyz="0.0 1.0 0.0" />
</joint>

<joint name="left_wheel_joint" type="continuous">
  <origin rpy="0 0 0" xyz="0.0 0.1 0.05" />
  <parent link="base_link" />
  <child link="left_wheel_1" />
  <axis xyz="0.0 1.0 0.0" />
</joint>
- joint 축 방향 수정
<joint name="right_wheel_joint" type="continuous">
  <origin rpy="0 0 0" xyz="0.0 -0.1 0.05" />
  <parent link="base_link" />
  <child link="right_wheel_1" />
  <axis xyz="0.0 1.0 0.0" />
</joint>

<joint name="left_wheel_joint" type="continuous">
  <origin rpy="0 0 0" xyz="0.0 0.1 0.05" />
  <parent link="base_link" />
  <child link="left_wheel_1" />
  <axis xyz="0.0 1.0 0.0" />
</joint>
- base_footprint 추가
<link name='base_footprint' />
...
<joint name='base_link_joint' type='fixed'>
  <origin rpy="0 0 0" xyz="0 0 0" />
  <parent link="base_footprint" />
  <child link="base_link" />
</joint>
- 다시 한 번 description을 실행합니다. 이번에는 launch file이 이름이 바뀌었습니다.
catkin build fusionbot_description
source devel/setup.bash

roslaunch fusionbot_description display.launch
- ROS 1의 launch file은 xml 문법을 사용했습니다.
joint_state_publisher와 robot_state_publisher를 사용하는 부분은 모두 ROS 2와 동일하며, robot_state_publisher는 robot_description을 요구하기 때문에 argument로 지정하고 있습니다.
# display.launch

<launch>
  <arg default="$(find fusionbot_description)/urdf/fusionbot.xacro" name="model"/>
  <arg default="true" name="gui"/>
  <arg default="$(find fusionbot_description)/launch/urdf.rviz" name="rvizconfig"/>
  <param command="$(find xacro)/xacro $(arg model)" name="robot_description"/>
  <param name="use_gui" value="$(arg gui)"/>
  <node name="joint_state_publisher" pkg="joint_state_publisher" type="joint_state_publisher"/>
  <node name="robot_state_publisher" pkg="robot_state_publisher" type="robot_state_publisher"/>
  <node args="-d $(arg rvizconfig)" name="rviz" pkg="rviz" required="true" type="rviz"/>
</launch>
- fusionbot.xacro 수정 - package://를 통한 파일 접근을 모두 $(find pkg) 형태로 변형해줍니다.
<link name="base_link">
  <inertial>
    <origin rpy="0 0 0" xyz="0.0037594591254762827 0.0 0.052804115668456025" />
    <mass value="2.3079643337726483" />
    <inertia ixx="0.00789" ixy="0.0" ixz="-0.000325" iyy="0.008347" iyz="0.0" izz="0.01475" />
  </inertial>
  <visual>
    <origin rpy="0 0 0" xyz="0 0 0" />
    <geometry>
      <mesh filename="$(find fusionbot_description)/meshes/base_link.stl" scale="0.001 0.001 0.001" />
    </geometry>
    <material name="silver" />
  </visual>
  <collision>
    <origin rpy="0 0 0" xyz="0 0 0" />
    <geometry>
      <mesh filename="$(find fusionbot_description)/meshes/base_link.stl" scale="0.001 0.001 0.001" />
    </geometry>
  </collision>
</link>
- ROS 2에서 세팅하였던 센서와 제어 plugin을 다시 ROS 1 버전으로 수정해주어야 합니다. 해당 작업은 gazebo_ros_pkg의 wiki 페이지를 참고하면 되며 이번 예시에서는 카메라 센서 하나 정도만 함께 작업해보겠습니다. ⇒ gazebo_ros_pkg
<plugin name="plugin_name" filename="libgazebo_ros_camera.so">
  <alwaysOn>true</alwaysOn>
  <updateRate>0.0</updateRate>
  <robotNamespace>custom_ns</robotNamespace>
  <cameraName>custom_camera</cameraName>
  <imageTopicName>custom_image</imageTopicName>
  <cameraInfoTopicName>custom_info</cameraInfoTopicName>
  <frameName>custom_frame</frameName>
  <hackBaseline>0.07</hackBaseline>
  <distortionK1>0.1</distortionK1>
  <distortionK2>0.2</distortionK2>
  <distortionK3>0.3</distortionK3>
  <distortionT1>0.5</distortionT1>
  <distortionT2>0.5</distortionT2>
</plugin>
<plugin name="plugin_name" filename="libgazebo_ros_camera.so">
  <!-- Change namespace, camera name and topics so -
       * Images are published to: /custom_ns/custom_camera/custom_image
       * Camera info is published to: /custom_ns/custom_camera/custom_info
  -->
  <ros>
    <namespace>custom_ns</namespace>
    <remapping>image_raw:=custom_img</remapping>
    <remapping>camera_info:=custom_info</remapping>
  </ros>

  <!-- Set camera name. If empty, defaults to sensor name (i.e. "sensor_name") -->
  <camera_name>custom_camera</camera_name>

  <!-- Set TF frame name. If empty, defaults to link name (i.e. "link_name") -->
  <frame_name>custom_frame</frame_name>

  <hack_baseline>0.07</hack_baseline>

  <!-- No need to repeat distortion parameters or to set autoDistortion -->
</plugin>
⇒ ROS 1에 존재했던 태크들이 대부분 ROS 2넘어가면서 중복 제거와 재편성이 되었습니다. 해당 부분을 참고하여 우리 상황에 맞게 수정을 해보겠습니다.
모든 작업이 완료된 패키지 압축 파일을 제공드리니 실습 도중 오류가 발생하면 참고하시기 바랍니다.
- 이제 모든 plugin들을 추가하였으니, fusionbot.gazebo파일에 include를 작성해주면 urdf 수정은 끝이 납니다.
<?xml version="1.0" ?>
<robot name="fusionbot" xmlns:xacro="http://www.ros.org/wiki/xacro" >

<xacro:property name="body_color" value="Gazebo/Silver" />
<xacro:property name="lidar_color" value="Gazebo/Blue" />
<xacro:property name="wheel_color" value="Gazebo/Black" />

<xacro:include filename="$(find fusionbot_description)/urdf/sensors/mono_cam.gazebo" />
<xacro:include filename="$(find fusionbot_description)/urdf/sensors/depth_cam.gazebo" />
<xacro:include filename="$(find fusionbot_description)/urdf/sensors/lidar_2d.gazebo" />
<xacro:include filename="$(find fusionbot_description)/urdf/sensors/lidar_3d.gazebo" />
<xacro:include filename="$(find fusionbot_description)/urdf/sensors/imu.gazebo" />

<!-- hector_gazebo doesn't supports noetic -->
<!-- <xacro:include filename="$(find fusionbot_description)/urdf/sensors/gps.gazebo" /> -->

<xacro:include filename="$(find fusionbot_description)/urdf/controllers/diff_drive.gazebo" />

<gazebo reference="base_link">
  <material>${body_color}</material>
- gazebo를 실행시키기 위한 launch file을 만들고 패키지를 재빌드합니다.
joint_state_publisher, robot_state_publisher, gazebo_ros와 urdf_spawner를 통해 gazebo 상에 로봇을 최종 등장시키는 launch file 입니다.
<?xml version="1.0" encoding="UTF-8"?>

<launch>

  <!-- Robot pose -->
  <arg name="x" default="0"/>
  <arg name="y" default="0"/>
  <arg name="z" default="0"/>
  <arg name="roll" default="0"/>
  <arg name="pitch" default="0"/>
  <arg name="yaw" default="0"/>

  <arg name="world_name"   default="gcamp_world.world"/>
  <!-- <arg name="world_file" default="$(find fusionbot_description)/worlds/$(arg world_name)"/> -->
  <arg name="model_name"   default="fusionbot"/>

  <!-- send urdf to param server -->
  <!-- xacro -->
  <param name="robot_description" command="$(find xacro)/xacro --inorder '$(find fusionbot_description)/urdf/fusionbot.xacro'" />

  <!-- urdf or raw xml file -->
  <!-- <param name="robot_description" command="cat $(find museumGuide)/urdf_model/peoplebot.xml" /> -->

  <!-- Send fake joint values-->
  <node name="joint_state_publisher" pkg="joint_state_publisher" type="joint_state_publisher">
    <param name="use_gui" value="False"/>
  </node>

  <!-- Send robot states to tf -->
  <node name="robot_state_publisher" pkg="robot_state_publisher" type="robot_state_publisher" respawn="false" output="screen"/>

  <!-- Launch Gazebo World -->
  <include file="$(find gazebo_ros)/launch/empty_world.launch">
    <arg name="use_sim_time" value="true"/>
    <arg name="debug" value="false"/>
    <arg name="gui" value="true" />
    <!-- <arg name="world_name" value="$(arg world_file)"/> -->
  </include>

  <!-- Spawn My Robot -->
  <node name="urdf_spawner" pkg="gazebo_ros" type="spawn_model" respawn="false" output="screen"
        args="-urdf -param robot_description -model $(arg model_name)
              -x $(arg x) -y $(arg y) -z $(arg z)
              -R $(arg roll) -P $(arg pitch) -Y $(arg yaw)"/>

</launch>
현재는 주석처리가 되어 있지만 여러분의 world를 만들어 보시고 world 폴더 내 위치시킨 다음 해당 world에서 로봇을 등장시키는 실습도 해보시기 바랍니다.
World Extensive
github에는 다른 사람들이 만들어 둔 다양한 gazebo world들이 있습니다. 이들을 사용하는 방법을 익혀두면 여러분의 수고를 덜면서 더욱 다채로운 예시를 실행할 수 있습니다.
- 이번에 사용해볼 world는 clearpath의 cpr_gazebo 패키지안에 존재합니다. 해당 repo를 clone하고 빌드하겠습니다.
cd ~/catkin_ws/src
git clone https://github.com/clearpathrobotics/cpr_gazebo.git

cd ~/catkin_ws
catkin build cpr_office_gazebo
source devel/setup.bash
- 이제, 우리의 launch file을 수정해보겠습니다. 제가 uncomment 라고 해둔 라인 아래를 주석 해제 하신 뒤 마지막 부분에 아래의 라인을 추가하십니다.
<!-- Spawn Structure -->
<param name="office_geom" command="$(find xacro)/xacro --inorder '$(find cpr_office_gazebo)/urdf/office_construction_geometry.urdf.xacro'" />
<node name="office_world_spawner" pkg="gazebo_ros" type="spawn_model"
  args="-urdf -model office_construction_geometry -param office_geom -x 0 -y 0 -z 0 -Y 0" />
이제 마지막 예시를 실행해보겠습니다.
catkin build fusionbot_description
source devel/setup.bash

# Terminal 1
roslaunch fusionbot_description gazebo.launch
# Terminal 2
rviz
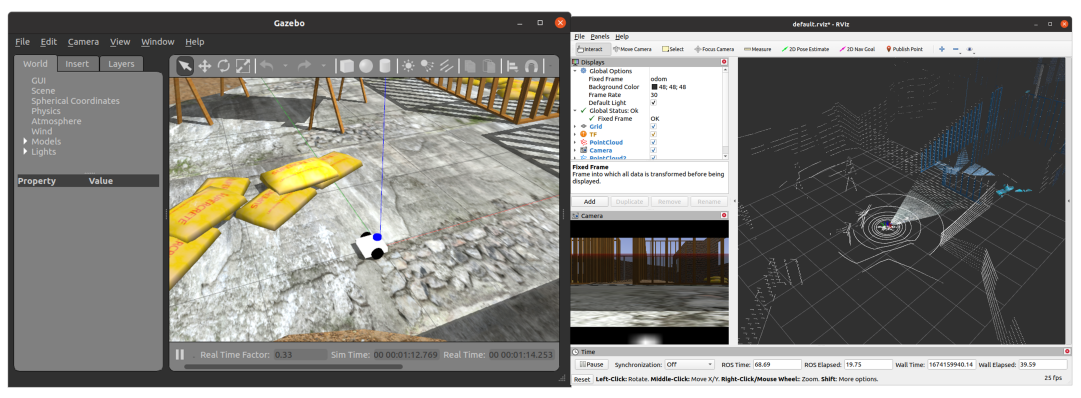
- 다채로운 시뮬레이션 world에서 plugin을 통해 추가했던 수많은 센서 데이터들을 rviz를 사용하여 마음껏 시각화해보시기 바랍니다. 😃