Lecture8 - ROS 2 Action and Examples
지금까지 Topic, Service에 대해 모두 배워보았습니다. 마지막 통신 메커니즘인 Action에 대해서 배워봅시다.
ROS2 Action 개념
Action은 Service와 Topic의 특성을 모두 갖고 있으며, 실제로 가장 늦게 탄생한 통신 메커니즘입니다. 일전 Service의 단점을 상기시켜보면서 Action의 필요성에 대해 체감해봅시다.
Service의 중요한 특징 한 가지 추가하자면, 하나의 Service Server에 여러 Client가 request 할 수 있지만, Server는 동시에 여러 request를 처리하지 못합니다.
- image from : docs.ros.org
Action은 바로 이러한 Service의 단점을 극복하기 위해 탄생한 통신 메커니즘입니다.
Action의 특징
- action client는 action server가 Result를 보내기 전까지 마냥 기다리지 않고, 다른 일을 할 수 있습니다.
- action client는 Result Response를 받기 전에도 지속적으로 Feedback을 받을 수 있습니다.
- 따라서, Feedback을 받고 있다가, 뭔가 잘못 돌아가고 있다는 것을 감지한 경우 cancel을 할 수도 있습니다.
⇒ 하지만, 여러 request를 동시에 작업하는 것이나, Feedback 중에 topic subscribe와 같은 작업은 본질적으로 불가합니다. 이에 대한 해결 방법도 후에 살펴보겠습니다.
image from : https://docs.ros.org/en/foxy/Tutorials/Understanding-ROS2-Actions.html
사진과 같이 Action Client와 Server가 주고받는 내용은 크게 5가지가 있습니다.
- Client ⇒ Server, Goal Request (service request와 유사합니다.)
- server ⇒ client, Goal Response
- client ⇒ server, Result Request
- server ⇒ client, Feedback (topic과 유사합니다.)
- server ⇒ client, Result Response
만약 4번 도중 cancel이 발생하면 Action은 종료됩니다.
이렇게 Action은 Topic, Service의 특징을 모두 갖고 있으며 Cancel이라는 추가 기능까지 갖추고 있는 복잡한 통신 메커니즘입니다.
Action 커멘드 라인 툴
- turtlesim을 실행시킨 뒤, 실습을 진행해봅시다.
ros2 run turtlesim turtlesim_node
- 실행 중인 action은 다음과 같이 조회 가능합니다.
$ ros2 action list
/turtle1/rotate_absolute
- 특정 action의 정보를 조회하기 위해 ros2 action info를 사용합니다.
$ ros2 action info /turtle1/rotate_absolute
Action: /turtle1/rotate_absolute
Action clients: 0
Action servers: 1
    /turtlesim
- Action에서 사용되는 데이터 타입은 action이며 ros2 interface show를 통해 조회 가능합니다.
$ ros2 interface show turtlesim/action/RotateAbsolute
# The desired heading in radians
float32 theta
---
# The angular displacement in radians to the starting position
float32 delta
---
# The remaining rotation in radians
float32 remaining
- 커멘드 라인에서 손쉽게 Action Goal을 보낼 수 있습니다. (feedback option을 제공합니다.)
$ ros2 action send_goal <action_name> <action_type> <values>
$ ros2 action send_goal /turtle1/rotate_absolute turtlesim/action/RotateAbsolute "{theta : 0.0}" --feedback
1657646954.088327 [0]       ros2: using network interface enp7s0 (udp/166.104.135.89) selected arbitrarily from: enp7s0, docker0
Waiting for an action server to become available...
Sending goal:
     theta: 0.0

Goal accepted with ID: d3ddca85948d4099a13dbeb8183e5ecc

Result:
    delta: -0.7839995622634888

Goal finished with status: SUCCEEDED
Action 프로그래밍
Action Client 작성하기
- 일전 거북이를 회전시키는 Action Server에 매칭되는 Action Client입니다. 거북이가 움직이기 원하는 각도를 입력하면 해당 각도록 회전하기 시작합니다.
$ colcon build --packages-select py_action_tutorial
$ source install/local_setup.bash

$ ros2 run py_action_tutorial turtle_turning_client
[INFO] [1672647544.783857088] [turtle_rotate_client]: === Turtle Rotate Action Client Started ====
Enter Target Angle : 3.14
[INFO] [1672647549.097662572] [turtle_rotate_client]: Goal accepted
[INFO] [1672647549.193173672] [turtle_rotate_client]: Received feedback: 0.051996707916259766
[WARN] [1672647549.226111271] [turtle_rotate_client]: Action Done !! Result: -0.12800025939941406
- Action Client를 생성하기 위해서는 ActionClient 패키지를 추가해야 합니다.
import rclpy
from rclpy.action import ActionClient
from rclpy.node import Node
- 우리가 사용할 turtlesim/action/RotateAbsolute라는 action은 다음과 같은 구조를 갖습니다.
# The desired heading in radians
float32 theta
---
# The angular displacement in radians to the starting position
float32 delta
---
# The remaining rotation in radians
float32 remaining
- Action Client는 ActionClient 인스턴스입니다. Service Client와 매우 비슷하다는 것을 알 수 있습니다.
# Create Action Client
self.action_client = ActionClient(self, RotateAbsolute, 'turtle1/rotate_absolute')
- action type : Client가 사용할 action 데이터 타입
- action name : Action Server 이름
- wait_for_server를 통해 Action Server의 존재 여부를 우선 확인합니다.
# Wait for server first
if self.action_client.wait_for_server(10) is False:
    self.get_logger().error('Server Not exists')
- Action Client는 callback이 많아 각 함수에 대한 실행 시점을 잘 알아두셔야 합니다.
# Send Goal then receive future
self._send_goal_future = self.action_client.send_goal_async(
    goal_msg, feedback_callback=self.feedback_callback
)

# Done callback Add
self._send_goal_future.add_done_callback(self.goal_response_callback)
- send_goal : main 함수에서 호출되며, Goal request를 진행합니다.
- feedback_callback : Server로부터의 Feedback이 들어올 때마다 실행되는 Callback 입니다.
- goal_response_callback : Goal Accpet와 Reject 여부를 확인합니다.
- get_result_callback : 최종 result에 대한 Callback으로, Action의 제일 마지막에 실행됩니다.
Action은 메커니즘 자체가 어렵기 때문에 일부러 쉬운 예제를 가져왔습니다. 코드의 로직은 간단하며, Action Client API 자체에 집중하며 따라와주세요.
- goal_response_callback : goal은 그 자체로 Service라고 말할 수 있습니다. 따라서, goal 완료까지 대기한 뒤 get_result_callback을 연동합니다.
def goal_response_callback(self, future):
    goal_handle = future.result()

    if not goal_handle.accepted:
        self.get_logger().info('Goal rejected')
        return

    self.get_logger().info('Goal accepted')

    # Add Result cb
    self._get_result_future = goal_handle.get_result_async()
    self._get_result_future.add_done_callback(self.get_result_callback)
- feedback_callback은 subscriber의 callback과 유사하게 매개변수로 feedback 데이터를 받습니다. get_result_callback은 goal_response_callback과 유사하게, future를 매개변수로 받습니다. 하지만 더이상 추가할 callback은 없고 result를 받으면서 마무리됩니다.
def feedback_callback(self, feedback_msg):
    feedback = feedback_msg.feedback
    self.get_logger().info(f'Received feedback: {feedback.partial_sequence}')

def get_result_callback(self, future):
    result = future.result().result
    self.get_logger().warn(f'Action Done !! Result: {result.sequence}')
    rclpy.shutdown()
- 이번 예시에 구현되어 있지는 않지만, goal_handle로부터 cancel handler를 생성할 수도 있습니다. 아래 코드를 예시에 적용한 다음, cancel도 실습해보세요.
    # Cancel the goal
    future = self.goal_handle.cancel_goal_async()
    future.add_done_callback(self.cancel_done)

    # Cancel the timer
    self.timer.cancel()

def cancel_done(self, future):
    cancel_response = future.result()
    if len(cancel_response.goals_canceling) > 0:
        self.get_logger().info('Goal successfully canceled')
    else:
        self.get_logger().info('Goal failed to cancel')

    rclpy.shutdown()
Action Server Example - Parking Master
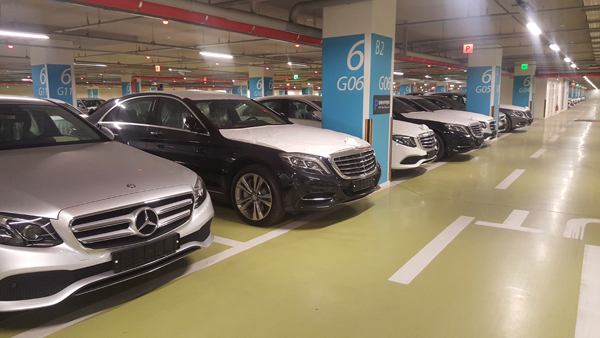
image from : 기호일보
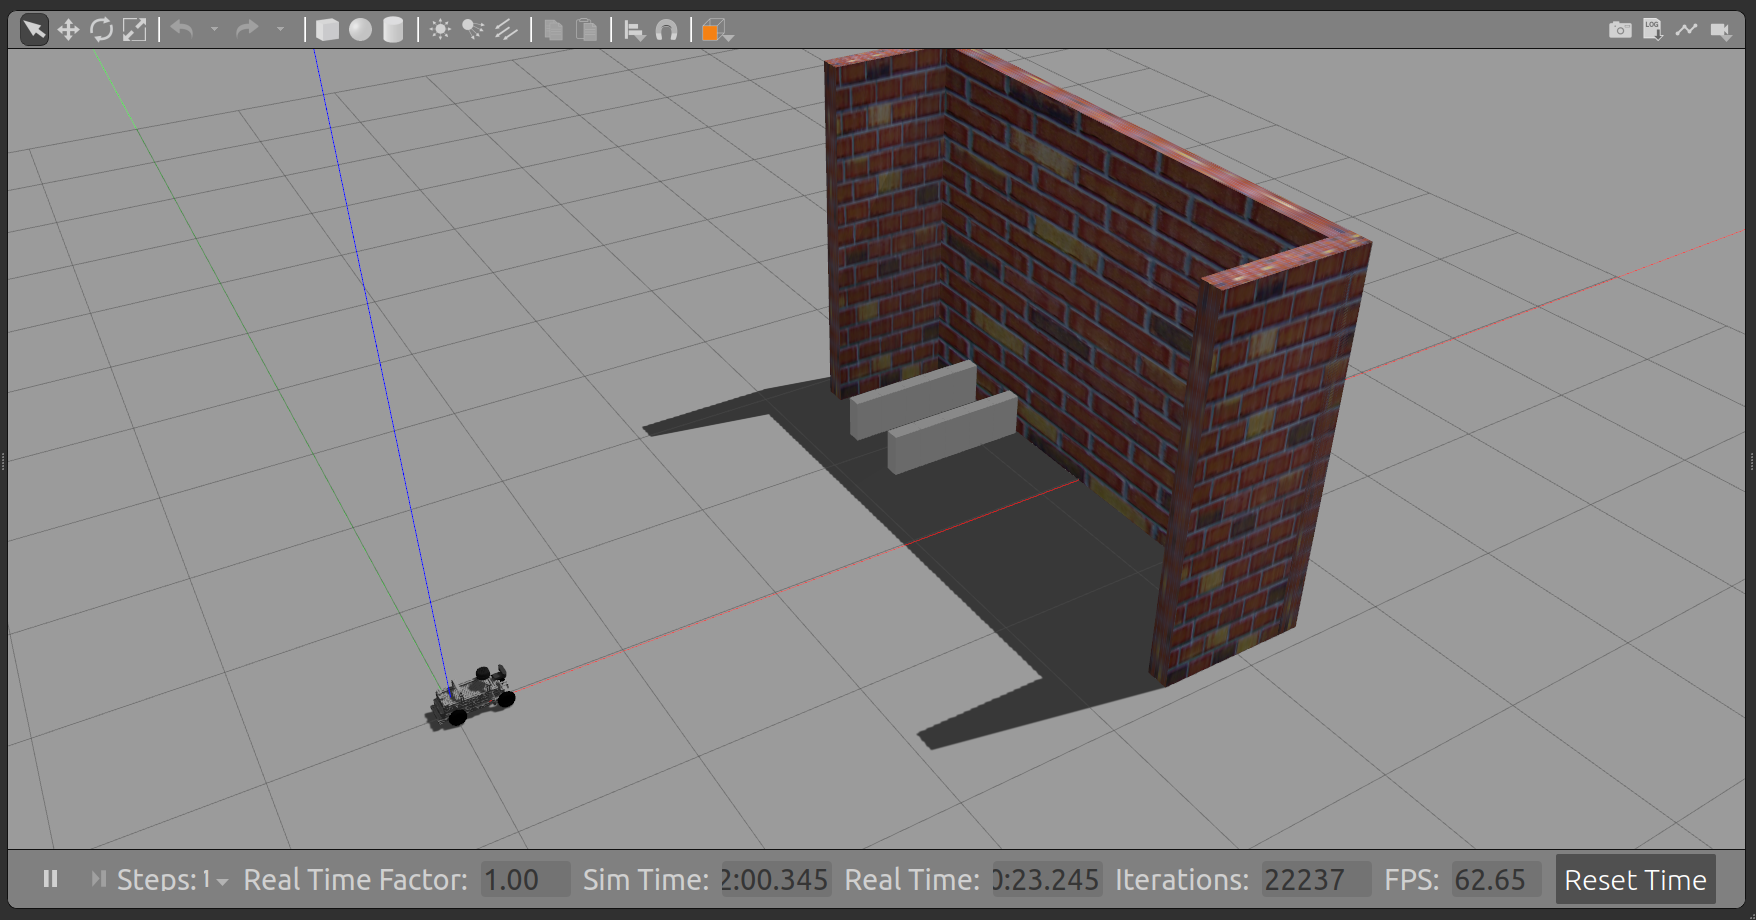
- 이번에는 재미있는 예시를 준비해 보았습니다. 아래 명령어을 입력해 주세요
cbp custom_interfaces
cbp parking_action_server
source install/local_setup.bash

# Terminal 1
ros2 launch src_gazebo wall_world.launch.py

# Terminal 2
ros2 run py_action_tutorial parking_action_server
[INFO] [1672654091.689062703] [parking_action_server]: Action Ready...
[INFO] [1672654101.355609636] [parking_action_server]: Executing goal...
[INFO] [1672654101.356973636] [parking_action_server]: Distance from forward obstacle : 100.0
...

# Terminal 3
ros2 action send_goal /src_parking custom_interfaces/action/Parking "start_flag: true" --feedback
Waiting for an action server to become available...
Sending goal:
     start_flag: true

Goal accepted with ID: d7bcfec5a6e94bd4a349f4955cc495c8

Feedback:
    distance: 100.0

Feedback:
    distance: 1.7898634672164917
...
벽에 인접하여 흰색 상자들이 주차 공간을 배정해줄 것입니다. rqt_robot_steering으로 로봇을 잘 제어하여 주어진 주차 공간에 알맞게 주차를 해보세요!
Feedback을 통해 벽과의 거리를 확인할 수 있으며, 이 거리가 0.5m 이내가 되면 주차가 완료됩니다. 이 시점에서 좌우 공간이 얼마가 균형이 맞는지에 따라 다른 Result를 얻게 됩니다.
- 올바른 주차 시 ⇒ Success!
- 잘못된 주차 시 ⇒ Fail
Action Server 프로그래밍
프로그래밍을 시작하기 전, 필요한 통신 메커니즘들을 살펴봅시다.
- Action Server : Goal을 받으면, 정면 벽과의 거리를 feedback으로 전달합니다. 최종 Result는 String으로 성공 여부를 알려줍니다.
- LaserScan Sub : 주변 물체와의 스캔된 거리를 알 수 있습니다.
Feedback Callback과 Subscription Callback 두 함수도 구현해야 할 것입니다.
- 이번 예시를 위해 custom interface를 만들어 보았습니다. Action 데이터 타입은 세 종류의 데이터로 이루어져 있습니다.
#goal definition
bool start_flag
---
#result definition
string message
---
#feedback definition
float32 distance
- 이제 코드를 살펴봅시다. Action Server를 사용하기 위해서는 ActionServer 패키지를 import 해야 합니다.
import rclpy
from rclpy.node import Node
from rclpy.action import ActionServer
- 코드 분석 전 살펴본 바와 같이 두 종류의 핸들러를 생성합니다.
class ParkingActionServer(Node):

    def __init__(self):
        super().__init__('parking_action_server')

        self.laser_sub = self.create_subscription(
            LaserScan, 'scan', self.sub_callback, 10
        )

        self.action_server = ActionServer(
            self, Parking, 'src_parking', self.execute_callback
        )
- Action Server의 Callback입니다. 첫 인자는 goal handler로 feedback 전송이 이를 통해 이루어집니다. feedback msg에는 정면 물체와의 거리가 담깁니다.
def execute_callback(self, goal_handle):
    self.is_sub = True
    self.get_logger().info('Executing goal...')
    feedback_msg = Parking.Feedback()

    while self.f_obs_distance > 0.5:
        feedback_msg.distance = self.f_obs_distance
        goal_handle.publish_feedback(feedback_msg)
        self.get_logger().info(
            f"Distance from forward obstacle : {self.f_obs_distance}"
        )
        time.sleep(1)
- while loop를 벗어나게 되면 goal succed를 수행하고, Result를 리턴합니다. 현재의 로직은 좌우 물체와의 거리가 균일할 때 성공으로 판정짓습니다.
    goal_handle.succeed()

    result = Parking.Result()
    lr_diff = abs(self.r_obs_distance - self.l_obs_distance)
    print(lr_diff)
    if lr_diff < 0.15:
        result.message = "[Success!] Oh... Teach me how you did :0"
    else:
        result.message = "[Fail] Be careful, Poor Driver! "
    return result
- main문에서 특별한 점을 찾아볼 수 있습니다. MultiThreadedExecutor를 사용하고 있는데요. 이것이 하는 역할이 무엇일지 실습을 통해 살펴봅시다.
try:
    parking_action_server = ParkingActionServer()
    # MultiThreadedExecutor  ref
    # https://url.kr/x4kf2b
    executor = MultiThreadedExecutor()
    executor.add_node(parking_action_server)
    try:
        executor.spin()
    except KeyboardInterrupt:
        parking_action_server.get_logger().info('Keyboard Interrupt (SIGINT)')
    finally:
        executor.shutdown()
        parking_action_server.destroy_node()
finally:
    rclpy.shutdown()
- main 문의 주석을 토글하고, sub_callback에 디버깅 메세지를 심은 다음, 다시 예제를 실행 시켜봅니다. 어떠한 결과를 얻으셨나요?
def sub_callback(self, data):

    if self.is_sub:
        self.f_obs_distance = data.ranges[60]
        self.r_obs_distance = data.ranges[30]
        self.l_obs_distance = data.ranges[90]
        self.get_logger().info("sub success")
        ...

    # parking_action_server = ParkingActionServer()
    # rclpy.spin(parking_action_server)
    # parking_action_server.destroy_node()
    # rclpy.shutdown()
현재의 시스템은 두 종류의 callback을 갖고 있습니다. execute_callback이 실행되면서 while loop로 진입하면, 자원을 점유하여 sub_callback이 동작할 수 없는 구조가 됩니다. 이를 해결하기 위해 ROS 2에서는 rclpy단에서 멀티 스레딩을 구현해 두었습니다.

- image from : docs.ros.org
이후 여러가지 구현을 하다 보면 지금처럼 다중 Subscribe를 해야하는 경우가 반드시 생깁니다. 혹은 하나의 프로세스에서 여러개의 Node를 실행시켜야 하는 경우가 발생합니다. 이때, Node Composition과 MultiThreadedExecutor를 적극 사용해보세요!
참고자료